Pipewire is a modern approach to multimedia handling in Linux. It aims to improve the experience of working with media within Linux and can be a drop-in replacement for both PulseAudio and JACK . In this post, we’ll be setting up the pipewire pulseaudio service to handle audio inputs and outputs.
Installation
Pipewire is available in the default Void repo so all we need to do is:
sudo xbps-install pipewireIf you haven’t set up the default repository, you can run this instead
sudo xbps-install -R https://repo-default.void-linux.org/current -S pipewireIn this command, we specifically tell xbps-install to use the default repository with the -R flag, sync the repository with -S, and install the pipewire package.
Setting up the environment
XDG_RUNTIME_DIR
pipewire-pulse uses the XDG_RUNTIME_DIR path to store it’s runtime files. This environment variable isn’t set by default so we need to set it and make sure the directory is writeable by the user. To achieve this, I followed the Per-User Services documentation and made the following changes to the run script.
 #!/bin/sh

-export USER="<username>"
-export HOME="/home/<username>"
+export USER="iain"
+export HOME="/home/$USER"
+
+export XDG_RUNTIME_DIR="/run/user/$(id -u $USER)"
+mkdir $XDG_RUNTIME_DIR
+chown $USER:$USER $XDG_RUNTIME_DIR

 groups="$(id -Gn "$USER" | tr ' ' ':')"
 svdir="$HOME/service"
This creates the users runtime directory and sets the permissions on system start up. For me, it’s not a huge issue to do this before the user logs in as I only have the one user on my computer but if you wanted to wait for the user to login before creating it, you could modify the script to check that the output of w contains the user’s username before continuing to execute.
DBUS
For pipewire-pulse to work, it needs to be running in a DBUS session. To do this, we need to install dbus and enable the service.
sudo xbps-install dbus
sudo ln -s /etc/sv/dbus /var/service/
Then we can change the line in ~/.xinitrc that starts your window manager to use dbus-run-session instead of exec.
-exec bspwm
+dbus-run-session bspwm
To check that it’s working correctly, start your X session, open a terminal and check that the DBUS_SESSION_BUS_ADDRESS environment variable is set.
Running pipewire
Pipewire can be run using runit, however it is recommended that it’s run in the user session. To do this, you can add the following lines to your window managers auto start programs. For bspwm, that means adding the following lines to your ~/.config/bspwm/bspwmrc file
#!/bin/sh

pkill pipewire
pkill pipewire-pulse
# ...
pipewire &
pipewire-pulse &
# ...
Now when bspwm starts up, you should have pipewire and pipewire-pulse running in the background.
Managing audio IO settings
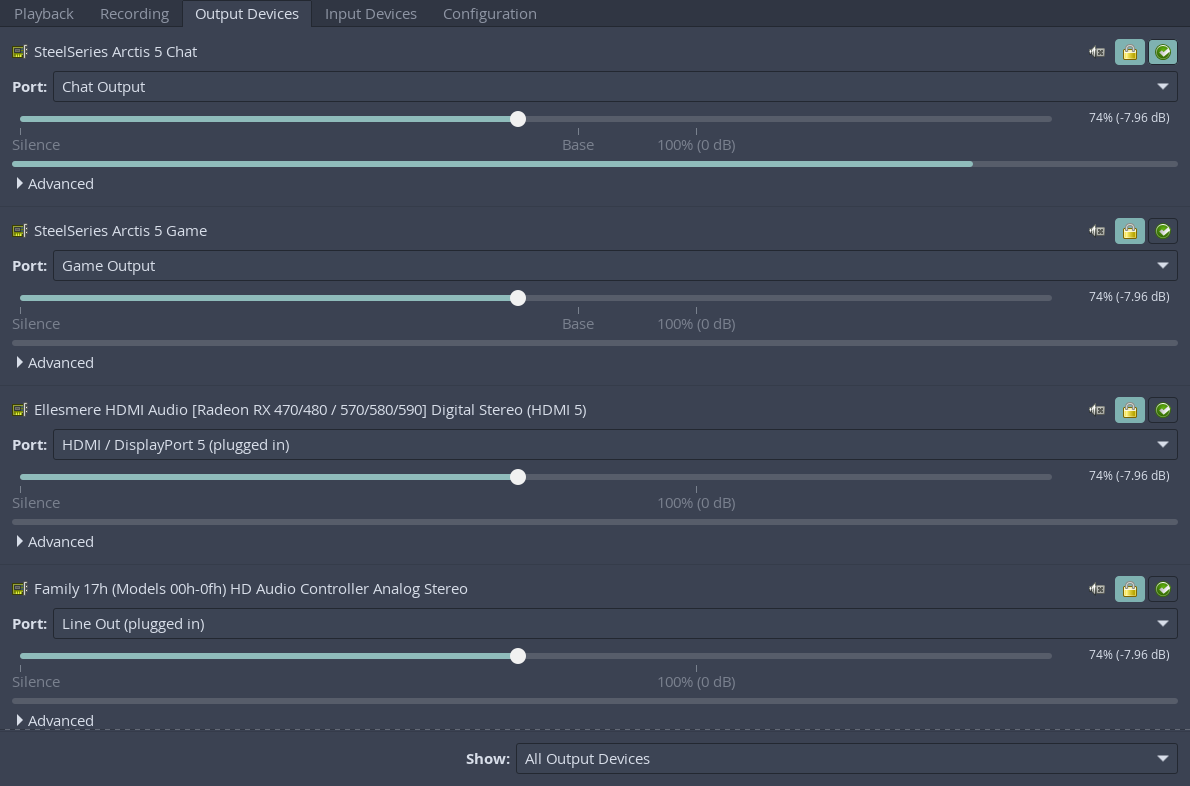
To manage your audio inputs and outputs, I like to use pavucontrol. This package is a simple GUI interface for controlling audio devices and their settings/configuration.
First install it with
sudo xbps-install pavucontrolthen in your terminal, run pavucontrol.
In the Outputs tab, you should be able to see a list of your output devices. If you can see them then your pipewire setup is ready to go!

